While going through Go tutorial video, I feel that it has most creepy syntax.
Here, first I will put the steps to seup Go, in your windows system, as you can get a lot of Go tutorials to know about its syntax & constructs. But more important is to have the setup to try those examples.
Word of caution : If you are coming from Java or C coding background, then you will see weird things here once you move to advanced topics like Interfaces, Exception handling etc. I have to admit the reason why Java got popular, it is power with elegance.
First download your Go version from https://golang.org/doc/install & install that.
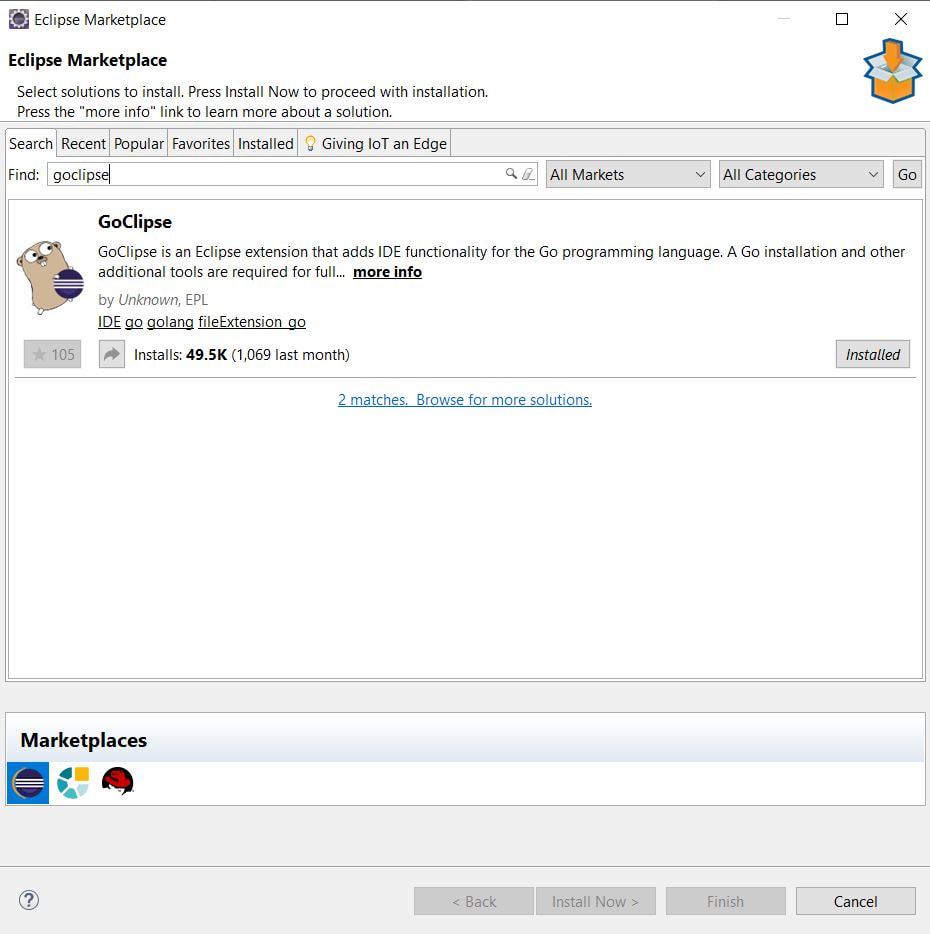
Now open your eclipse & go to Help -> Eclipse Marketplace
Search & install Goclipse plugin
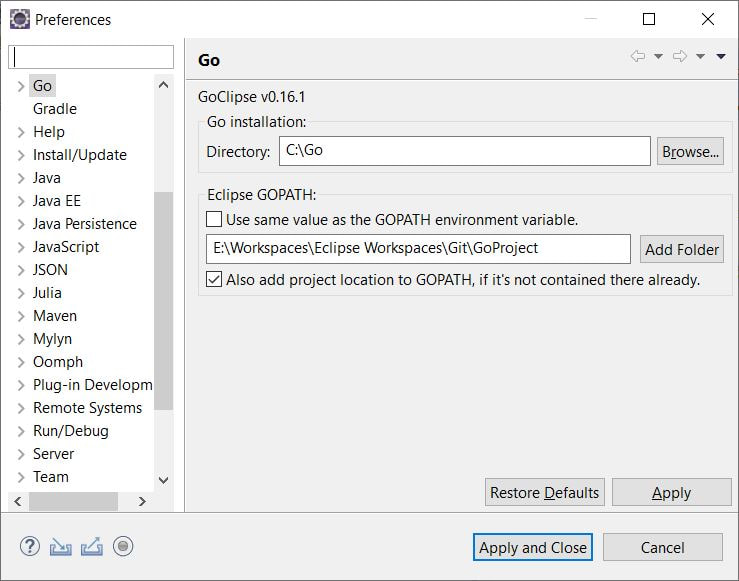
In Eclipse, create your Go project, then go to Window -> Preferences
And di the setup as shown in below images. Use your project name & path.
And di the setup as shown in below images. Use your project name & path.
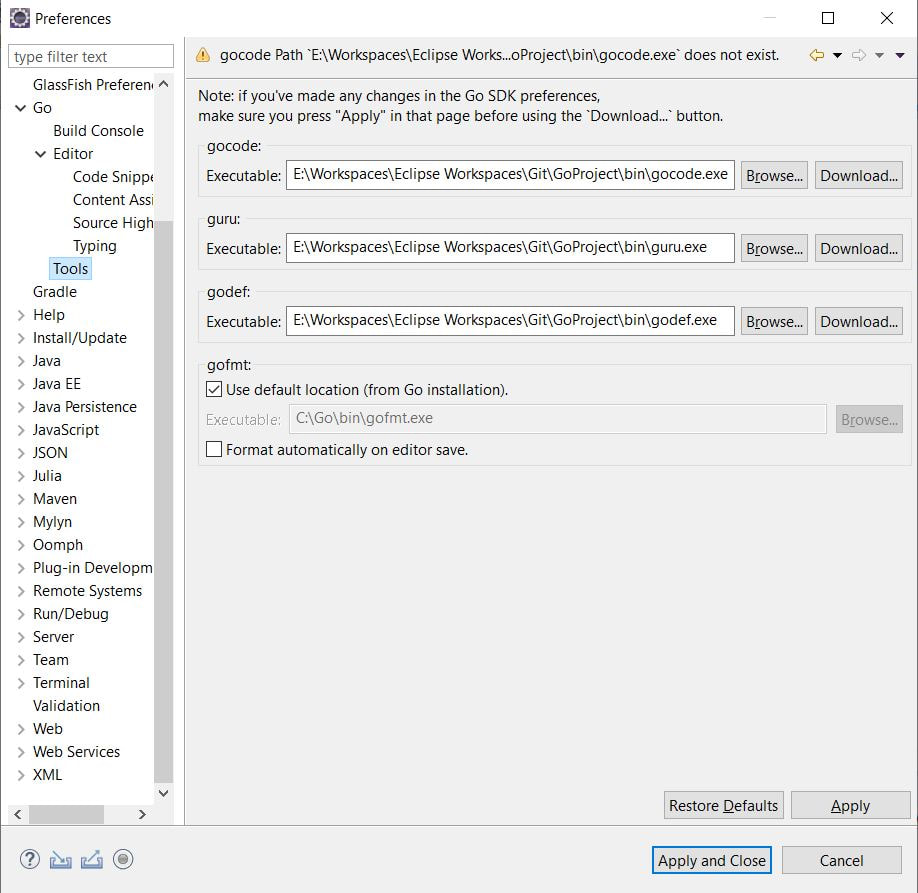
For Tools page, initially you will be having below text boxes as empty. Just click on the 'Download' button & 'Ok' in next window & below text boxes will be populated automatically as shown below.
Now you are all set to start writing your first Go file & execute that.
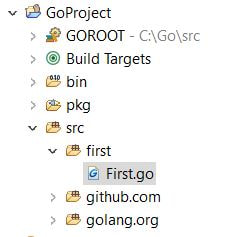
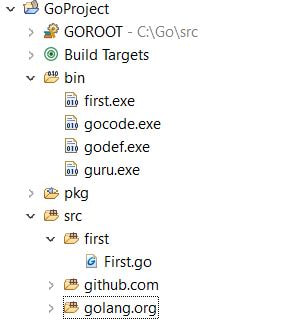
After above setup, your workspace will be looking like shown below -
After above setup, your workspace will be looking like shown below -
Now we need all the 3 exe available for use which we configured in above image.
Currently, these exe are not available, so can't use those features.
So using Ctrl+Shift+R, open all these 3 .go files in the eclipse.
Now execute all these 3 files as Go Application.
After successful execution of all these 3 files, 3 exe will be created in bin folder of your project like shown below -
Now you can use 'Auto completion' feature & you will get the list of methods available in a pkg.
Below is one sample to try at your end -
package main
import ("fmt"
"strconv"
)
var unused1 string = "unused1"
// unused2 := "unused2"
var firstName string = "Nitin"
func main() {
lastName := "Agrawal"
n := 2
var k uint64 = 78
// var unused3 string = "unused3"
// unused4 := "unused4"
// l := 79
fmt.Printf("%T", k)
// fmt.Println(l-k)
// fmt.Println(unused2)
fmt.Println(string(n))
fmt.Println(strconv.Itoa(n))
fmt.Printf("Hello %v %v %T\n", firstName, lastName, firstName)
fmt.Println(10 &^ 3)
}
Once the Go tools you installed earlier are working properly, you will see the keywords highlighted.
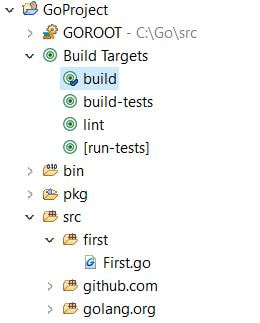
Now if you are getting any error is running the above code, then execute 'build' file in your workspace-
Build Targets -> build
Check if you see any errors in the workspace, may you are getting the errors in those 2 folders created as part of Go tools.
Delete those 2 folders & install the Go tools again , as you did earlier.
Again execute the 'build' file & now you shouldn't see any errors in workspace.
Once all errors are resolved you will get below output for the above code. But if you uncomment the commented code then you will get the compile errors, as Go doesn't allow any unused code in program, so you need to remove that part, so I commented those lines above.
So after this setup, if you have executed the Go programs few times then you would have observed that during execution you are getting the compilation errors. Because it is compiled when execute that. So how can we avoid this & you want to get the compile errors during your coding only not during the execution. Also you want to auto-format your code.
After below changes, your code will be compiled & auto formatted, as soon you save the code.
For this do the below changes in configuration -
After below changes, your code will be compiled & auto formatted, as soon you save the code.
For this do the below changes in configuration -
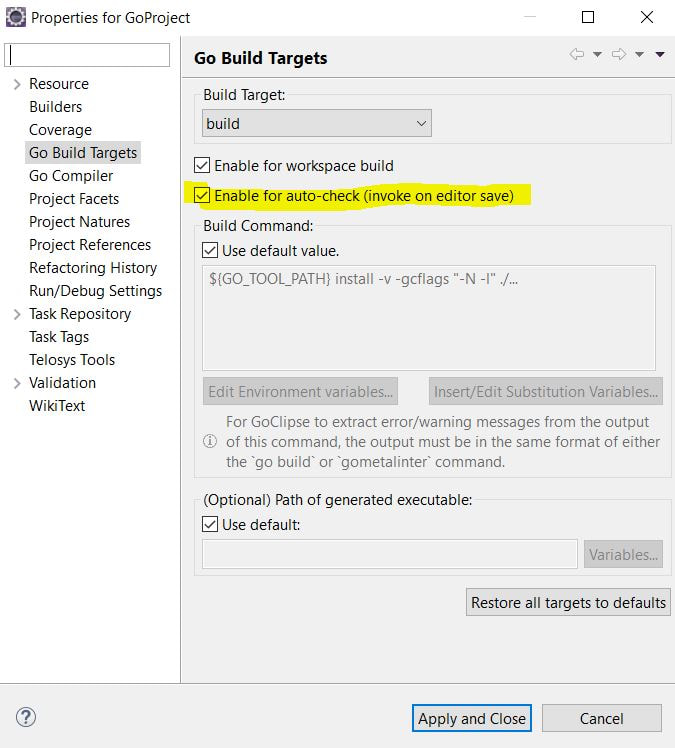
Right click on the Go project -> Properties -> Go Build Targets
Check the highlighted as shown in below image & you will get the sound in eclipse once you save your code & there is any compilation error -
Check the highlighted as shown in below image & you will get the sound in eclipse once you save your code & there is any compilation error -
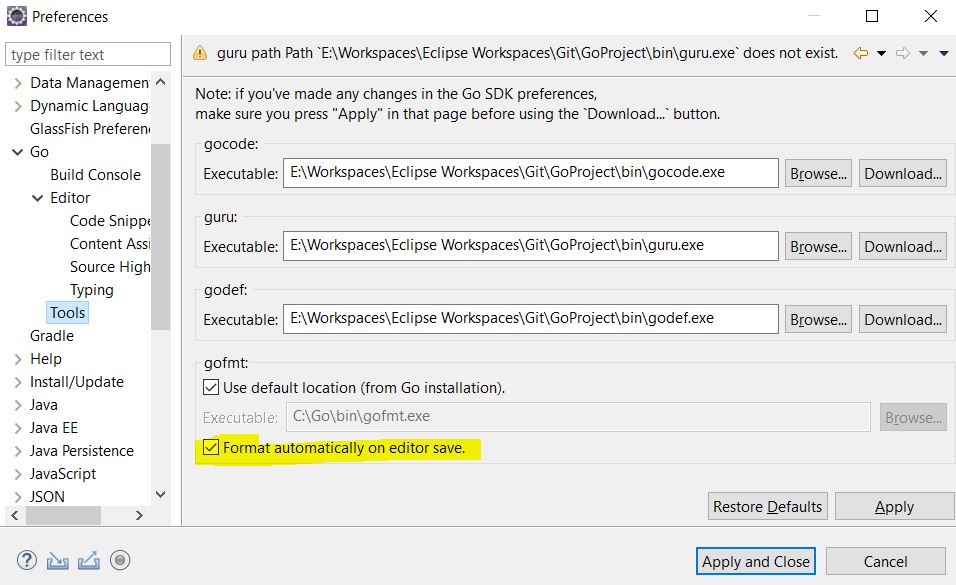
For auto-format go to Window -> Preferences -> Go -> Tools
And check the highlighted box, as shown below -
And check the highlighted box, as shown below -
